What is my CLTC Account?
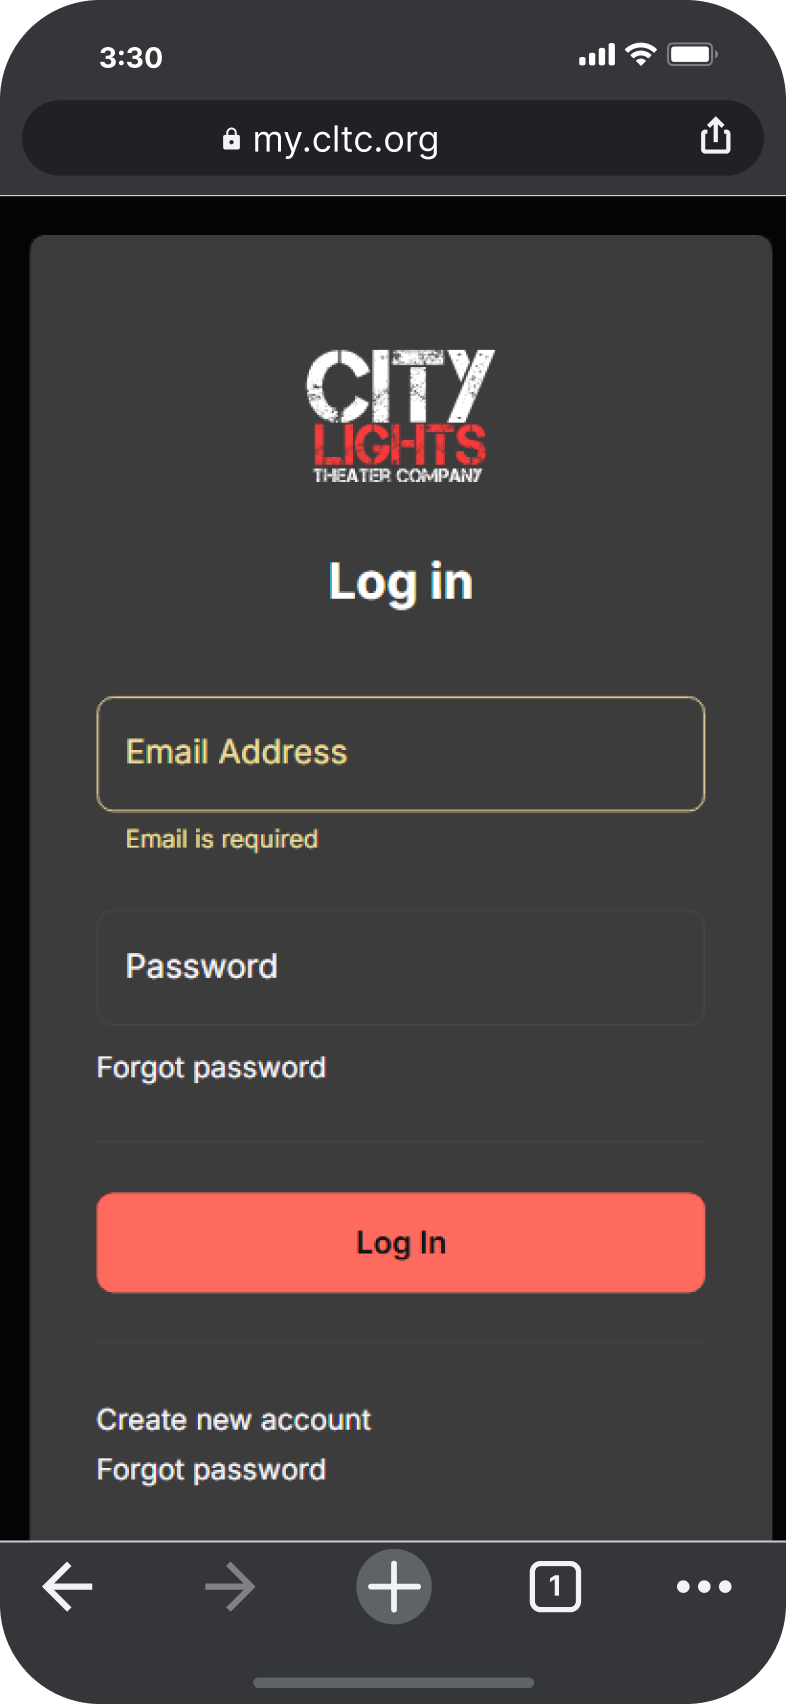
How do I sign into My CLTC Account?
I’m Confused. I Need a Password? I didn’t even know I had an Account.
That’s right. We imported all our past patrons, so if you purchased a ticket or made a donation in the last five years, your account is already set up. No need to create one!
All that’s left is to set your password and dive into the world of CLTC’s productions.
How Do I Recover or Reset My Password?
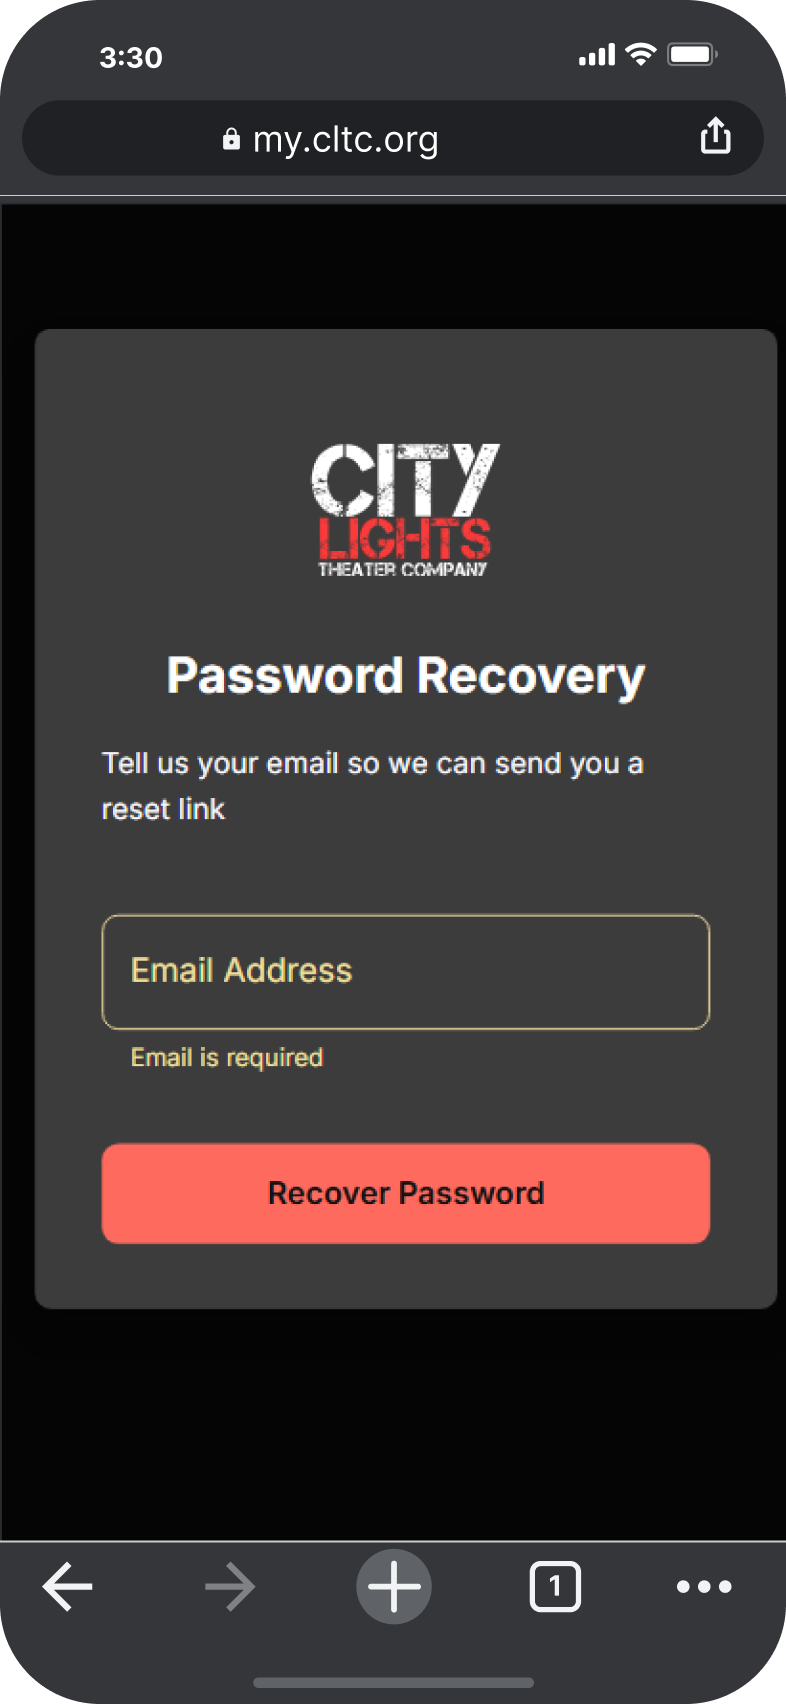
Step 1
- Visit Password Recovery.
- Enter your email address.
- Click “Recover Password.”
- Keep an eye on your inbox for a verification email from aws@upstagecrm.io. Check your spam folder if it doesn’t appear.
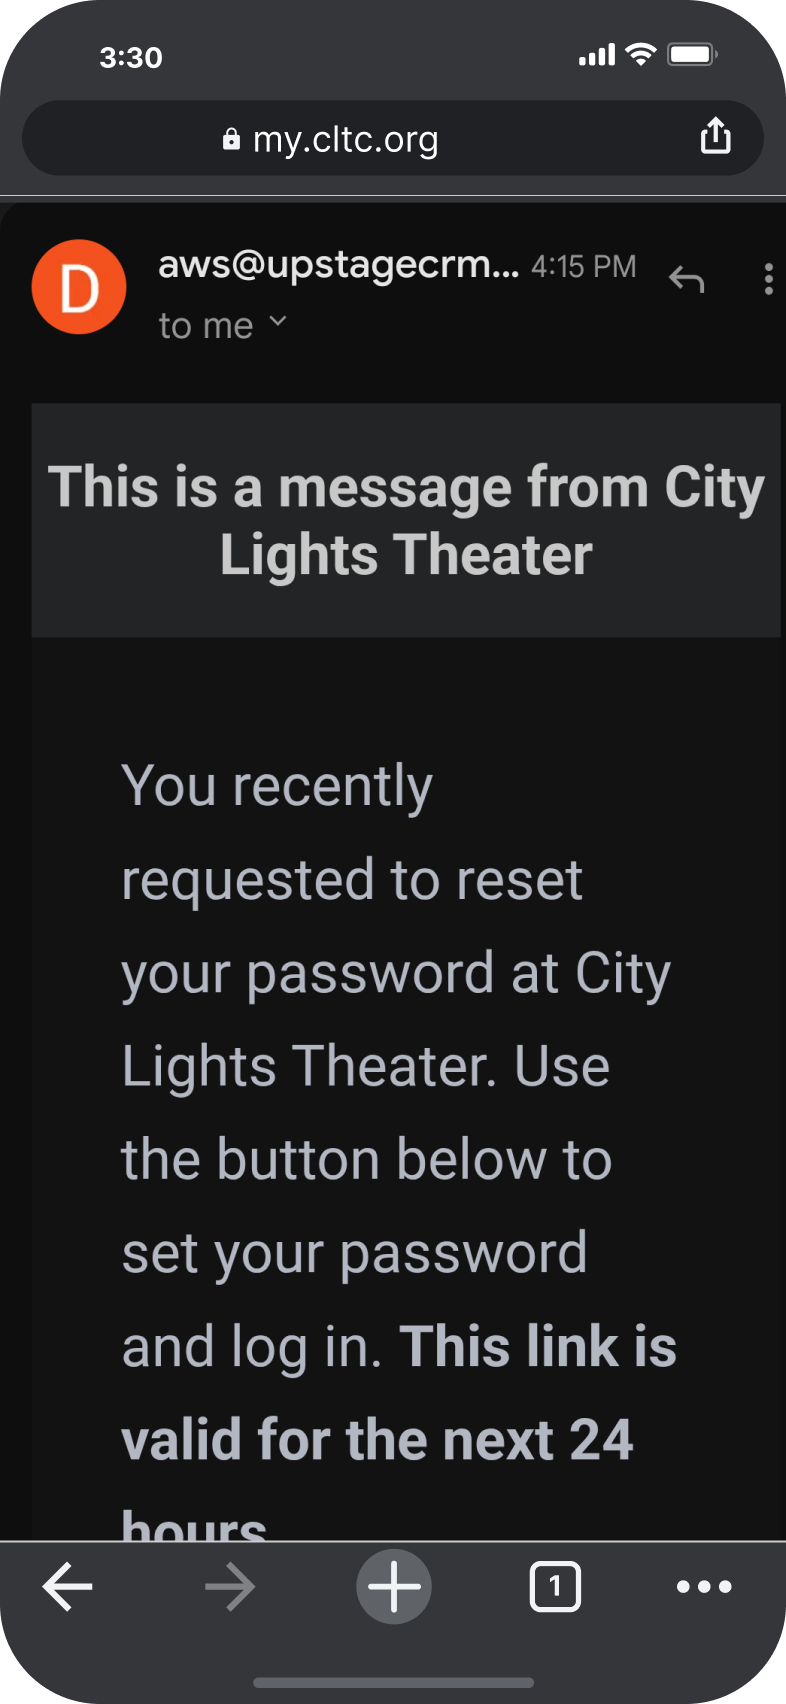

Step 2
- Open the email and click “Set Your Password and Log In.”
- Your email and verification code will be prefilled.
- Create a strong password.
- Click “Reset Password.”
HOW DO I CHANGE MY TICKET TYPE ON MY MOBILE DEVICE?
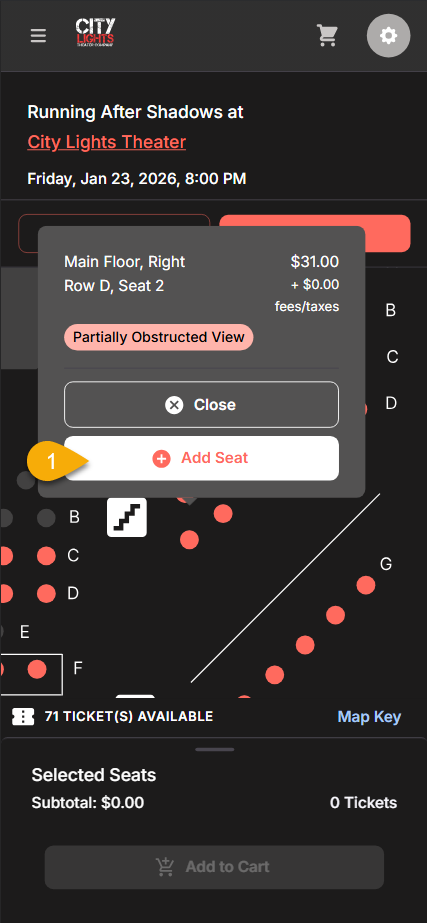
Step 1
- 1. Select your seats from the map and click “add seat.”
- Once all seats are “added,” you will see them under the seat map at the bottom of the screen.
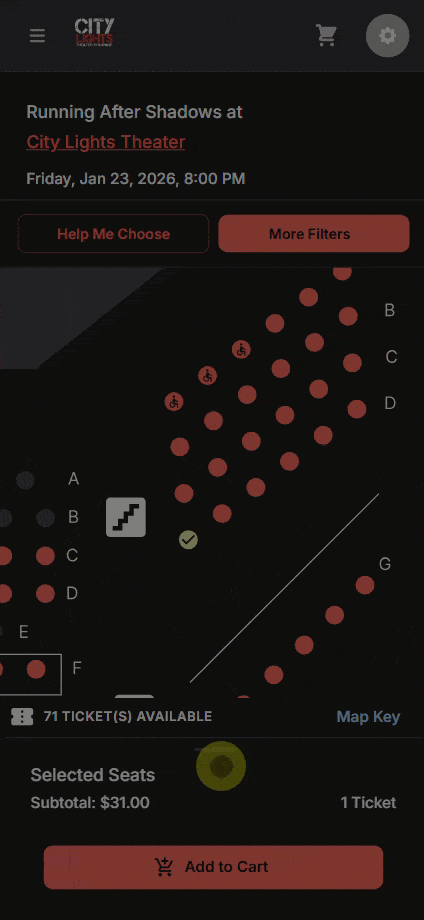
Step 2
- Scroll upward on the bottom section (where the circle is) and you will have the option to select the correct ticket type from the drop down list.
- Select “Add to Cart.”
Where Do I SEE MY UPCOMING SHOWS?

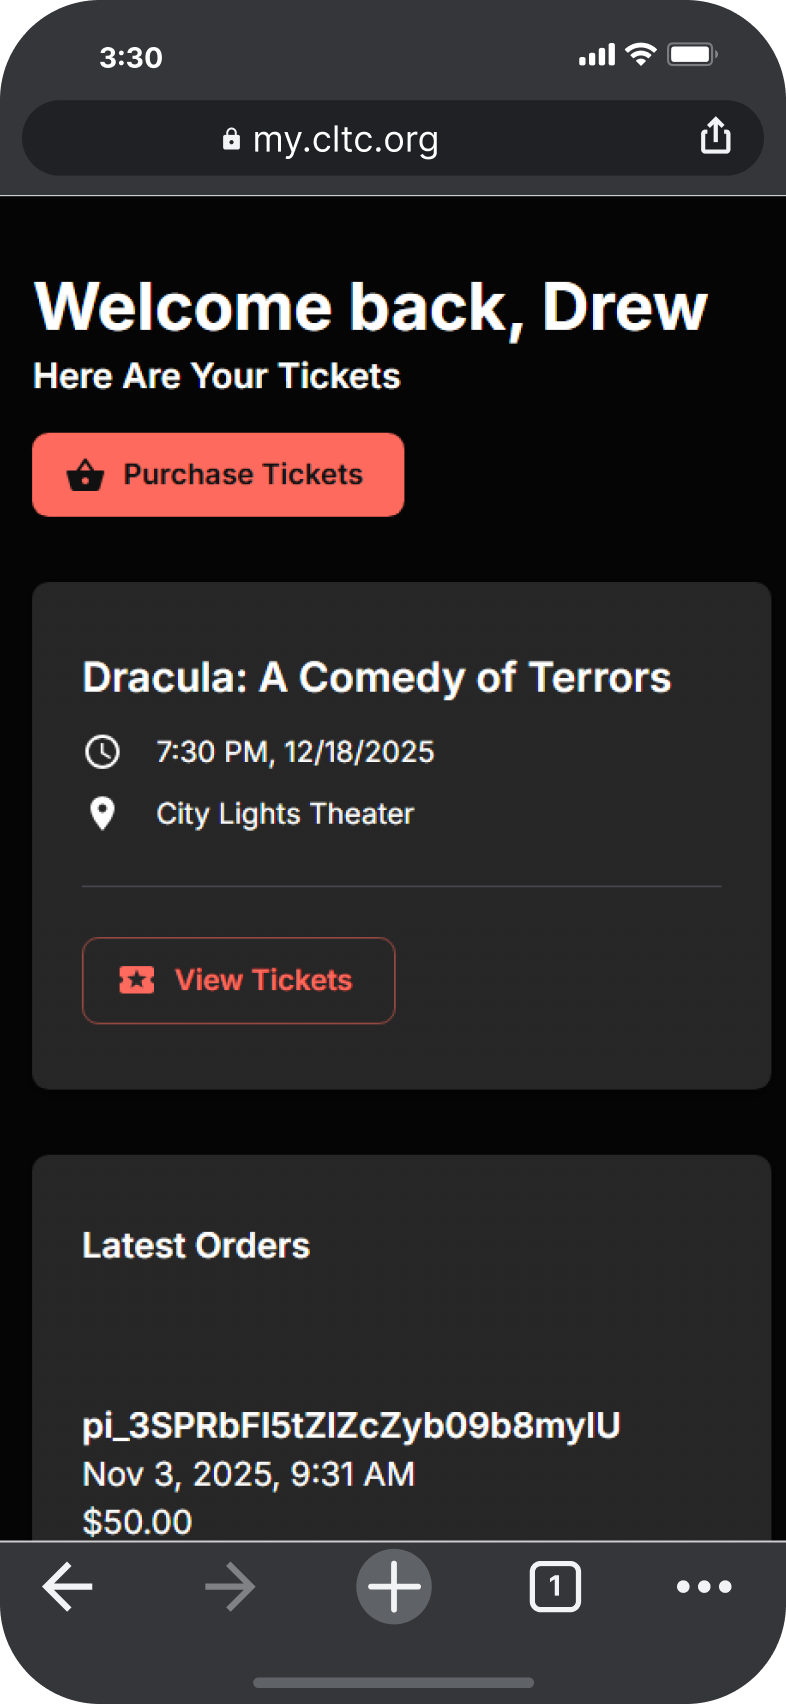
Access your tickets at any time by logging into your CLTC Account and you’ll see all of your upcoming event tickets on the home page.
You can also find all your upcoming and past tickets at “My Tickets.” As always, there’s no need to print your ticket ahead of time or show a digital version at the door. Our Easy Check-In process remains the same: just give your name at the front door for entry.
You will also receive several automatic emails with your digital tickets. One when you buy the tickets and one reminder on the day of the event!
Please contact us if you’re having trouble accessing your tickets or have any questions.
How Do I Use My Passes?

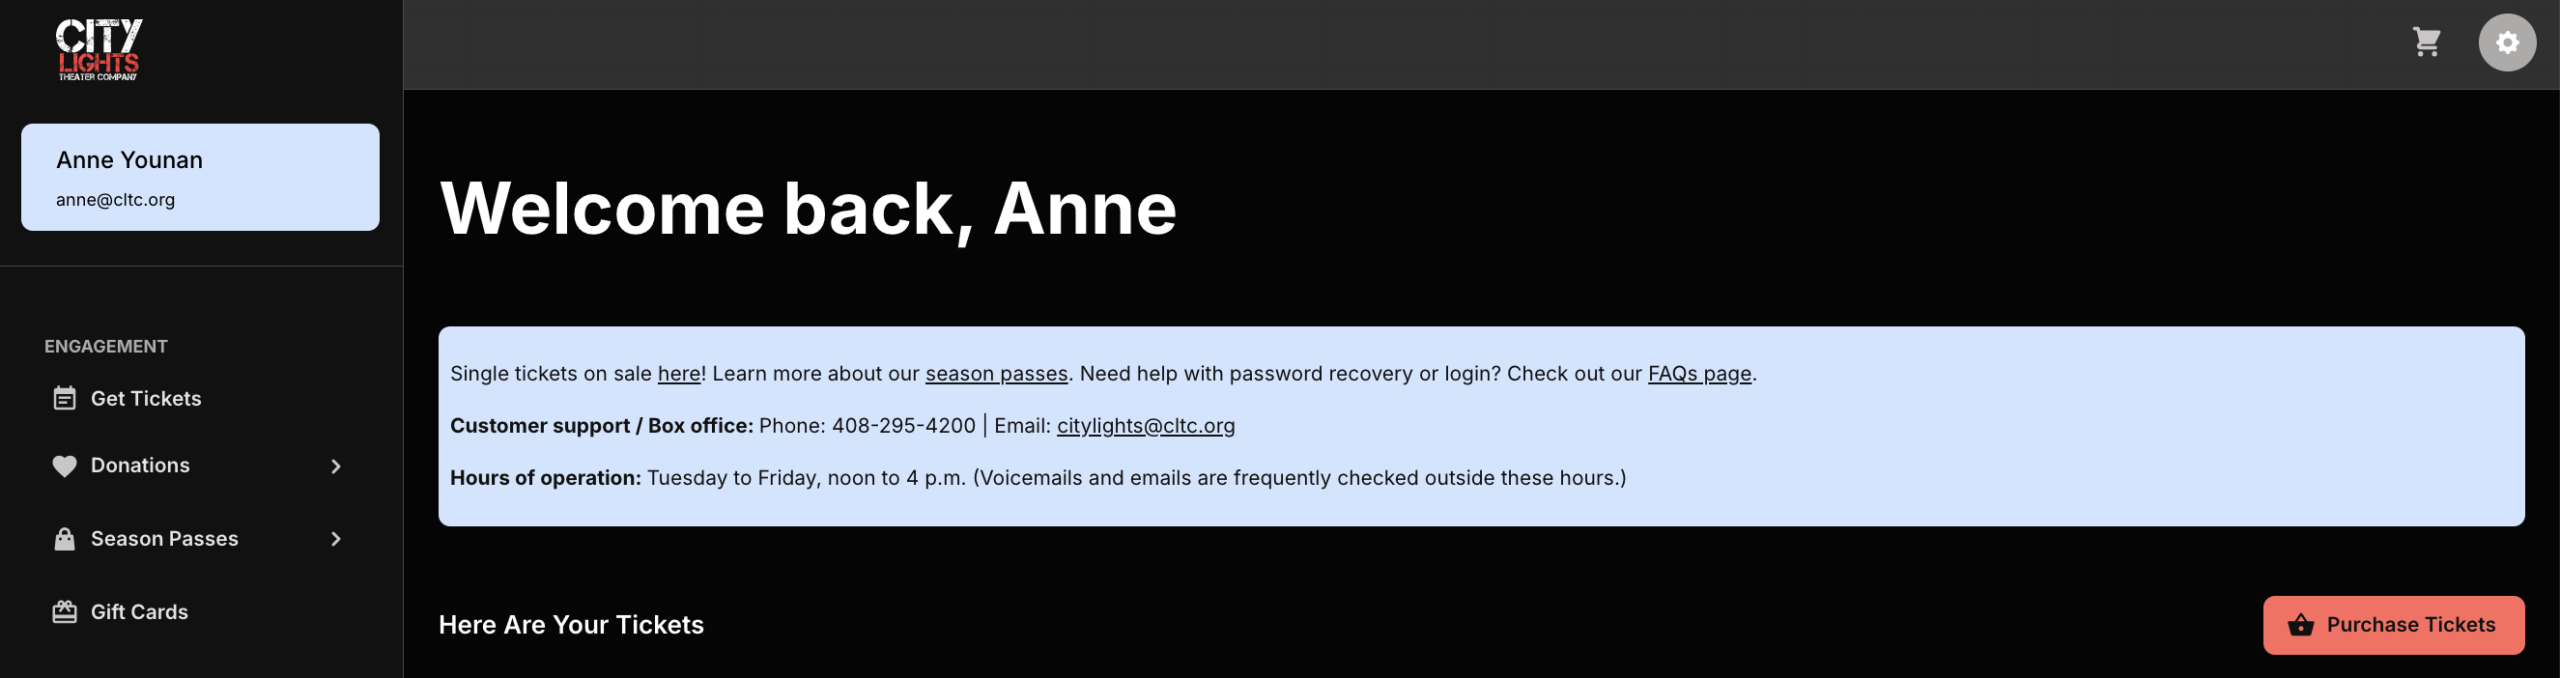
Step 2: Choose Event Dates
- Click “Get Tickets” from the left-side menu, or use the “Purchase Tickets” button on the right.
- Navigate to your desired date by clicking the arrow for “Next Month.” Then click “Get Tickets” for your desired date.
- Pro Tip: You can load all upcoming events by clicking the “Show All Upcoming Events” button and scrolling down until you find your date.

Step 3: Select Seats & Tickets
- Choose your preferred seats for an eligible event.
- Pro Tip: If your pass is for a ticket-type option like Seniors, select “Senior” from the Ticket Type dropdown after picking your seat.
- FYI: As of the 26-27 season, your pass(es) can be used for any ticket type. You can change the type or not; your pass will still apply correctly.
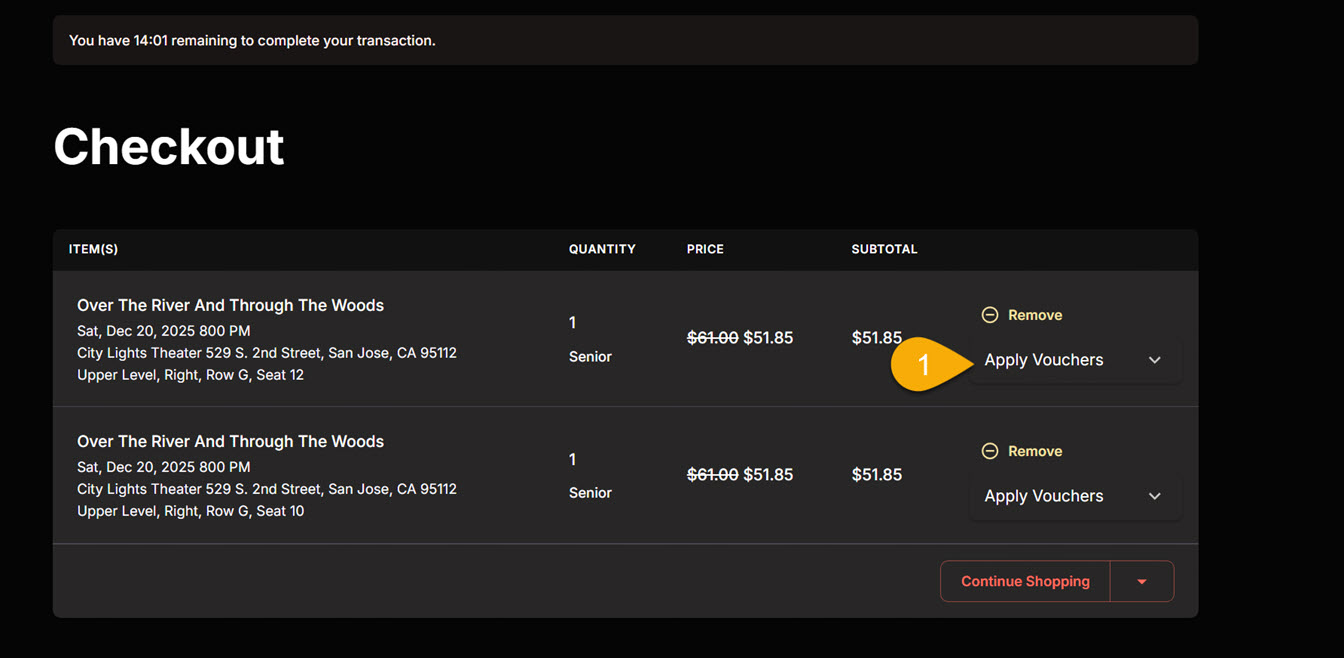
Step 4: Apply Passes (single pass)
- After adding all of your tickets to the cart, click the Checkout button.
- Eligible tickets will automatically display an “Apply Vouchers” dropdown.
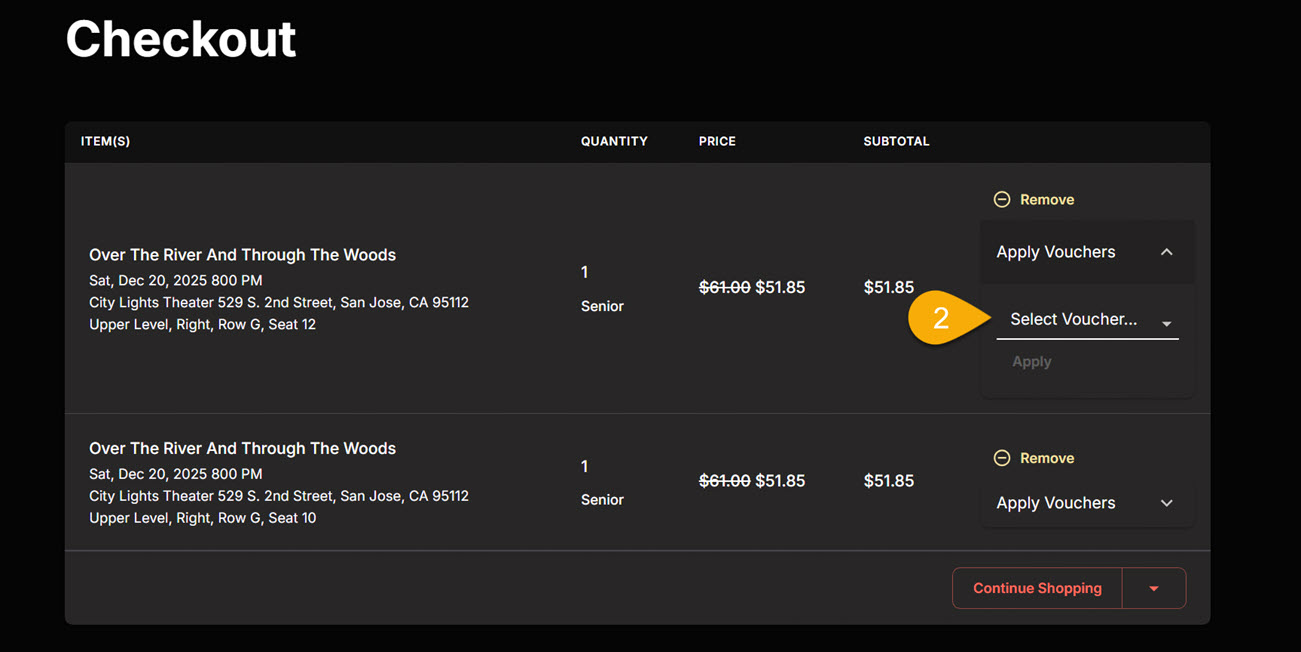
Step 4a: Multiple Pass Options
- If you have multiple pass types or a Buddy Pass*, use the “Select Voucher” dropdown to choose the specific one you wish to use. *2025-26 season only
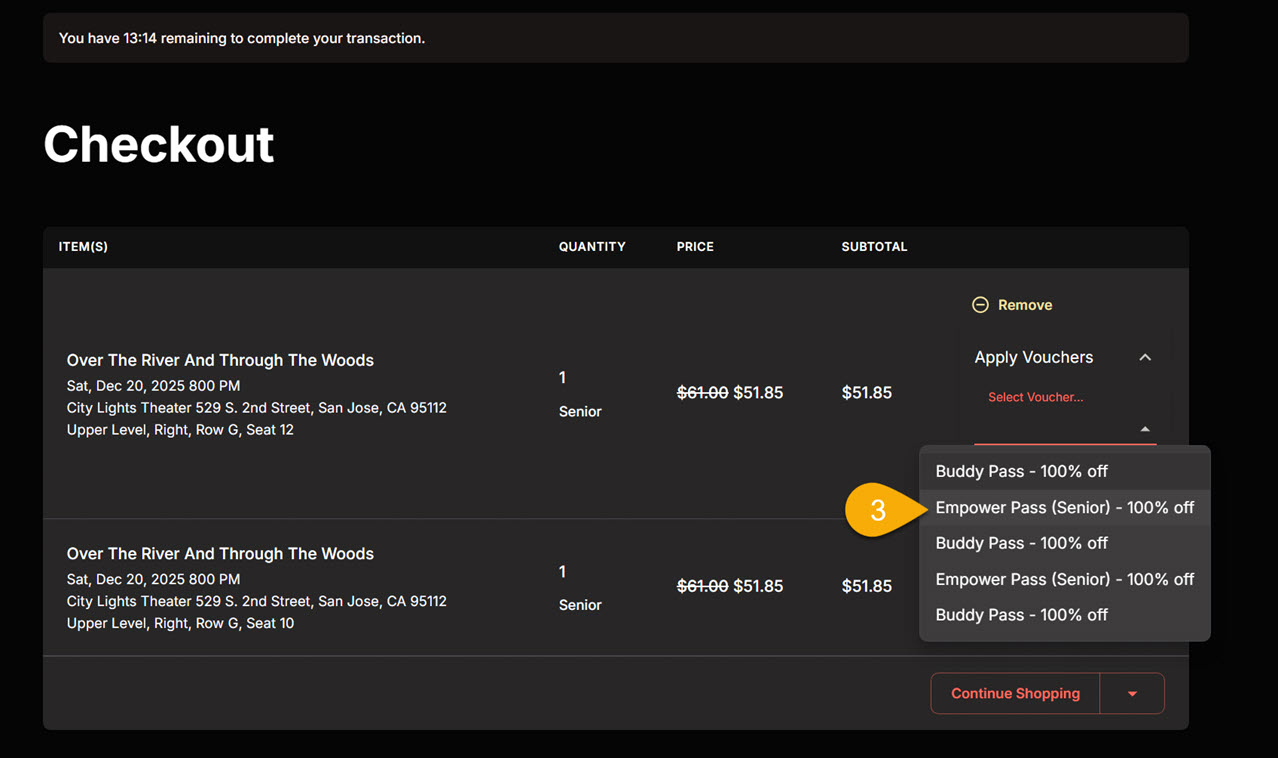
Step 4b: Select Pass
- From the list of eligible passes provided, select the one you want to apply to the ticket.
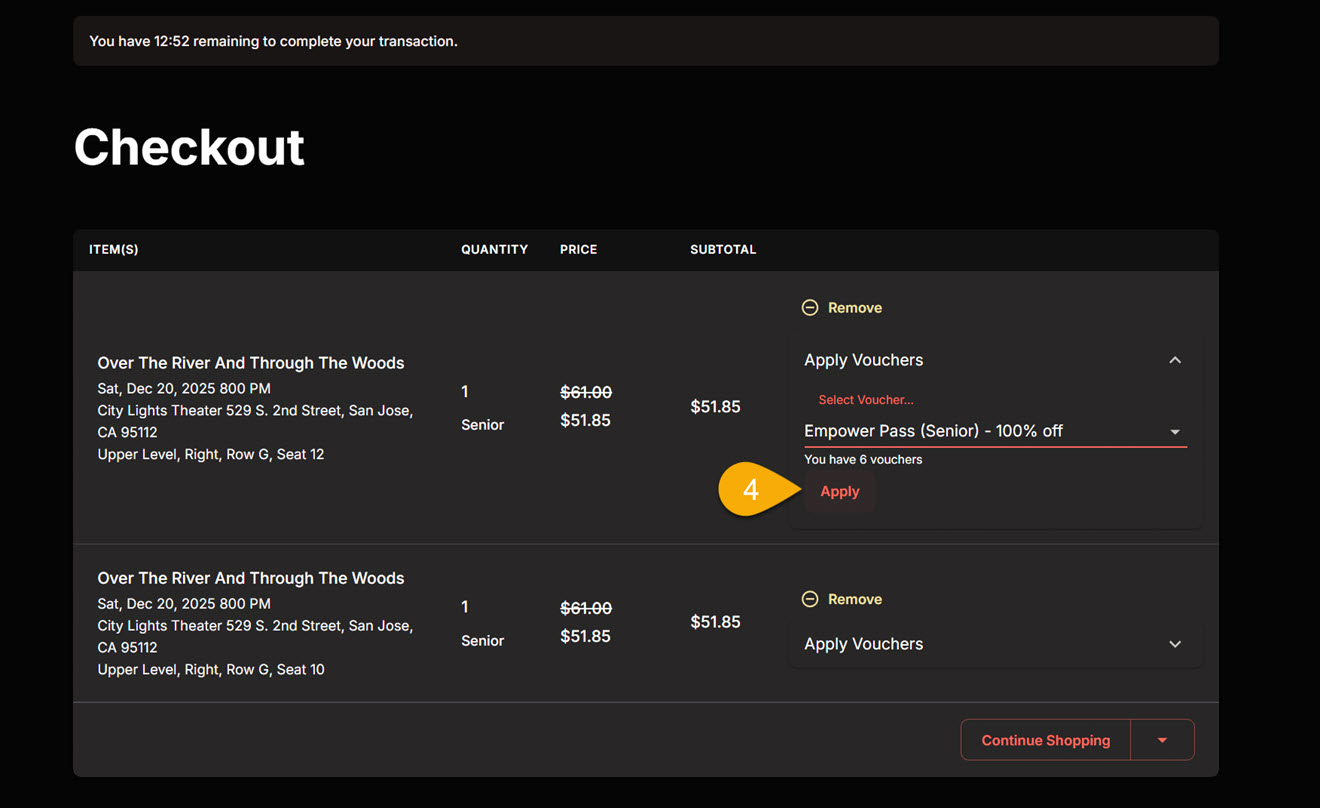
Step 4c: Apply Pass and Complete Purchase
- Click the “Apply” button to redeem your pass.
- Scroll down and click the “Complete Purchase” button.
- Pro Tip: The system will display your current voucher balance before you click apply and show the remaining balance on subsequent tickets. Once you’ve used all but one of your season passes, you’ll see only a red “Apply” link.
")


")


